How to configure Zendesk with Monema
Integrations
The virtual PBX service can be connected to the Zendesk service.
Functionalities offered
The functionalities it offers are the following:
- Call emission from Zendesk with a single click on the contact’s phone number.
- Informative popup of received calls indicating the contact, opportunity or organization from which the call is being received.
- Record of calls made with a link to the call recording.
- Reception of calls in the switchboard terminals with the name of the contact obtained from Zendesk.
1. Zendesk connector installation
- Go to the “Integrations” section of the Monema dashboard, locate the Zendesk module, and click the button on the left. Then click “Settings”.
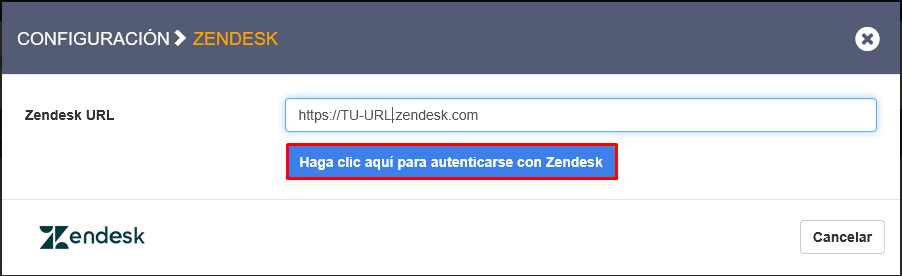
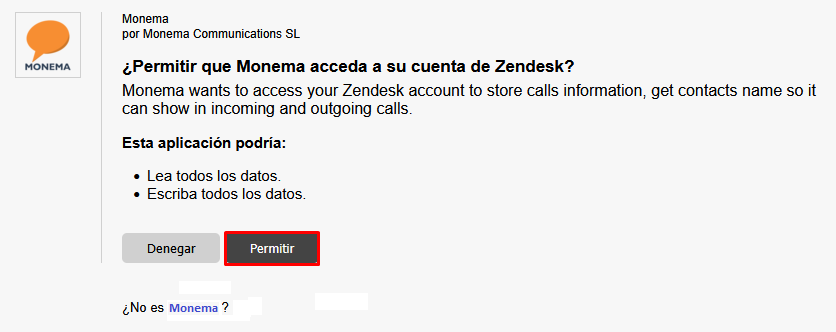
- Enter the URL and click the “Click here to authenticate with Zendesk” button. You'll be taken to a window asking for permission to allow Monema to access the data. Click “Allow”.
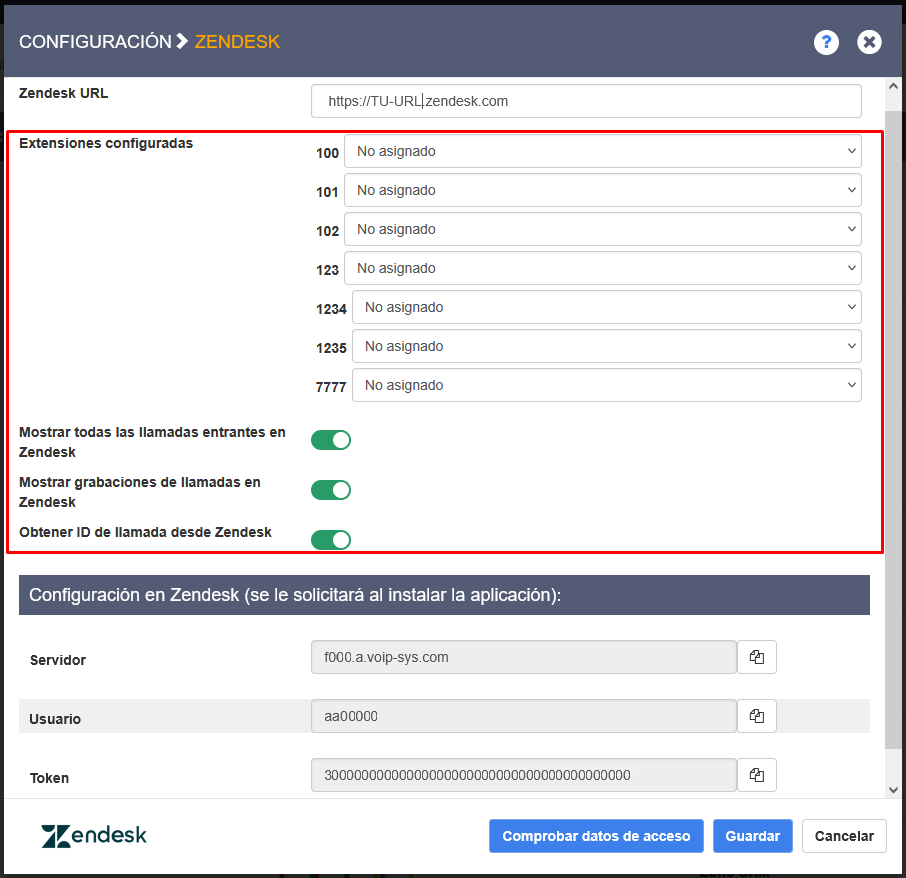
- Return to the Monema control panel and reopen the Zendesk settings. If everything went smoothly, the following fields will appear, where you can finish setting up the integration with Zendesk:
- Configured extensions: Assign to each extension of your PBX which Zendesk user you want to associate it to. Calls made and received from that extension will be associated to that Zendesk user.
- Show all incoming calls in Zendesk: if you want all incoming calls to be shown in the popup window in Zendesk, no matter if the extension is going to receive or not, activate this option. If you deactivate it, only the calls answered by the extension assigned to the Zendesk agent will be shown.
- Show call recordings in Zendesk: If you have call recording activated in your PBX and you activate this option, Zendesk will show the call recording in the tickets associated to a call.
- Get Caller ID from Zendesk: if this option is activated when receiving calls, the PBX will look for the caller’s name in Zendesk and it will be shown in your phone.

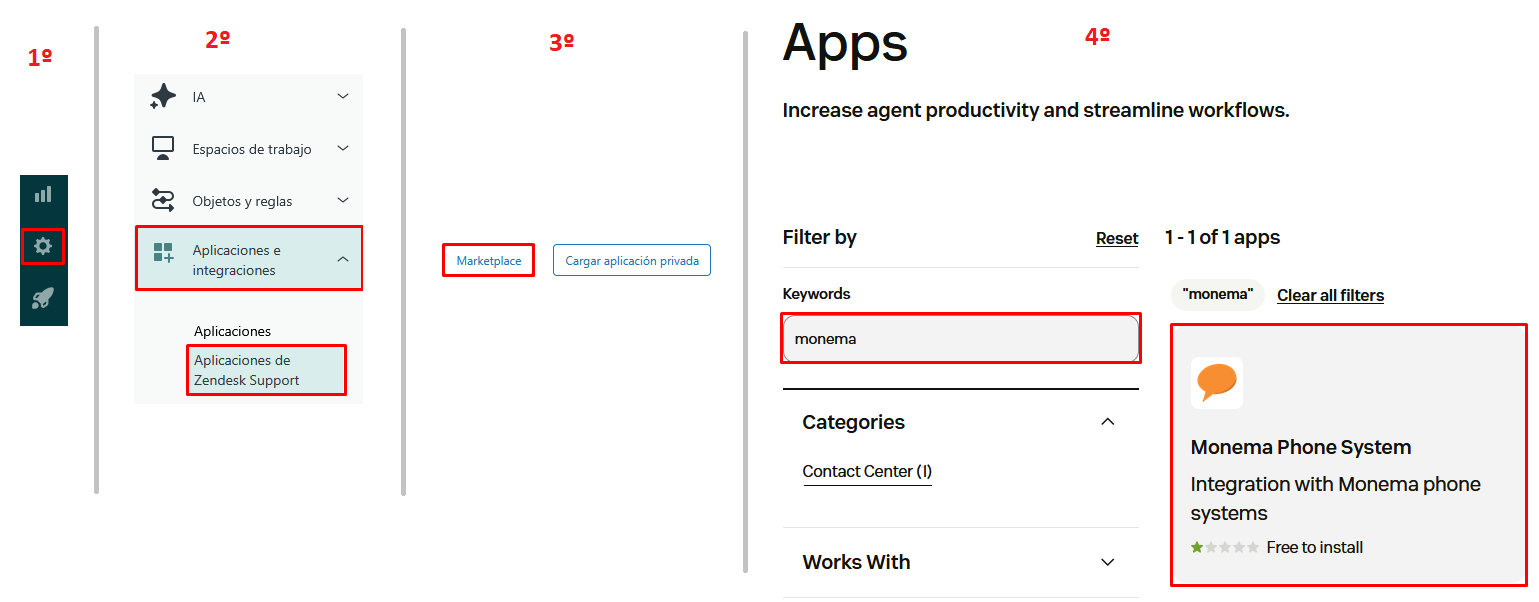
2. Configuration in Zendesk
- Click the “Administration” icon in the left-hand side menu.
- Apps and integrations > Zendesk Support apps.
- Marketplace.
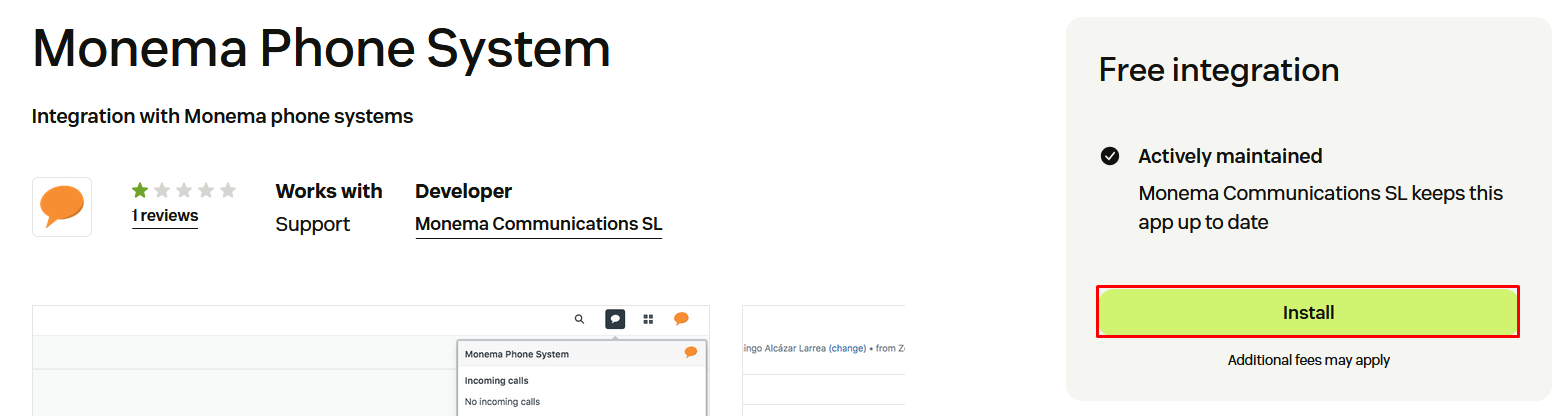
- Type “monema” in the search box > Click on the “Monema Phone System” app.
- Click “Install”.
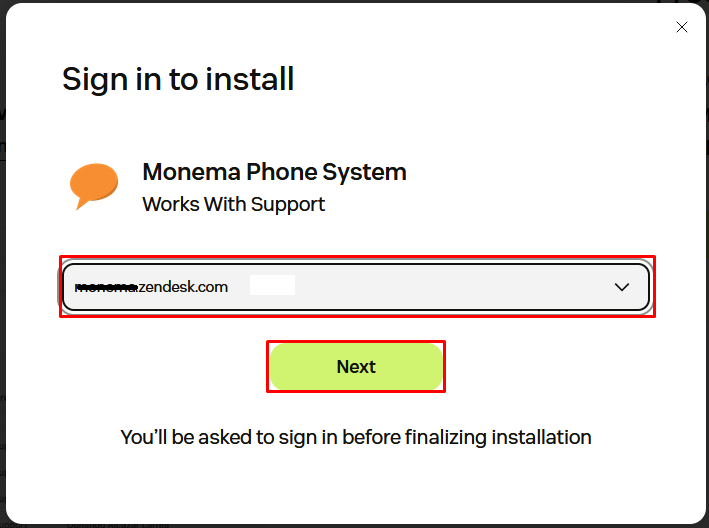
- Select your account and click “Next”.
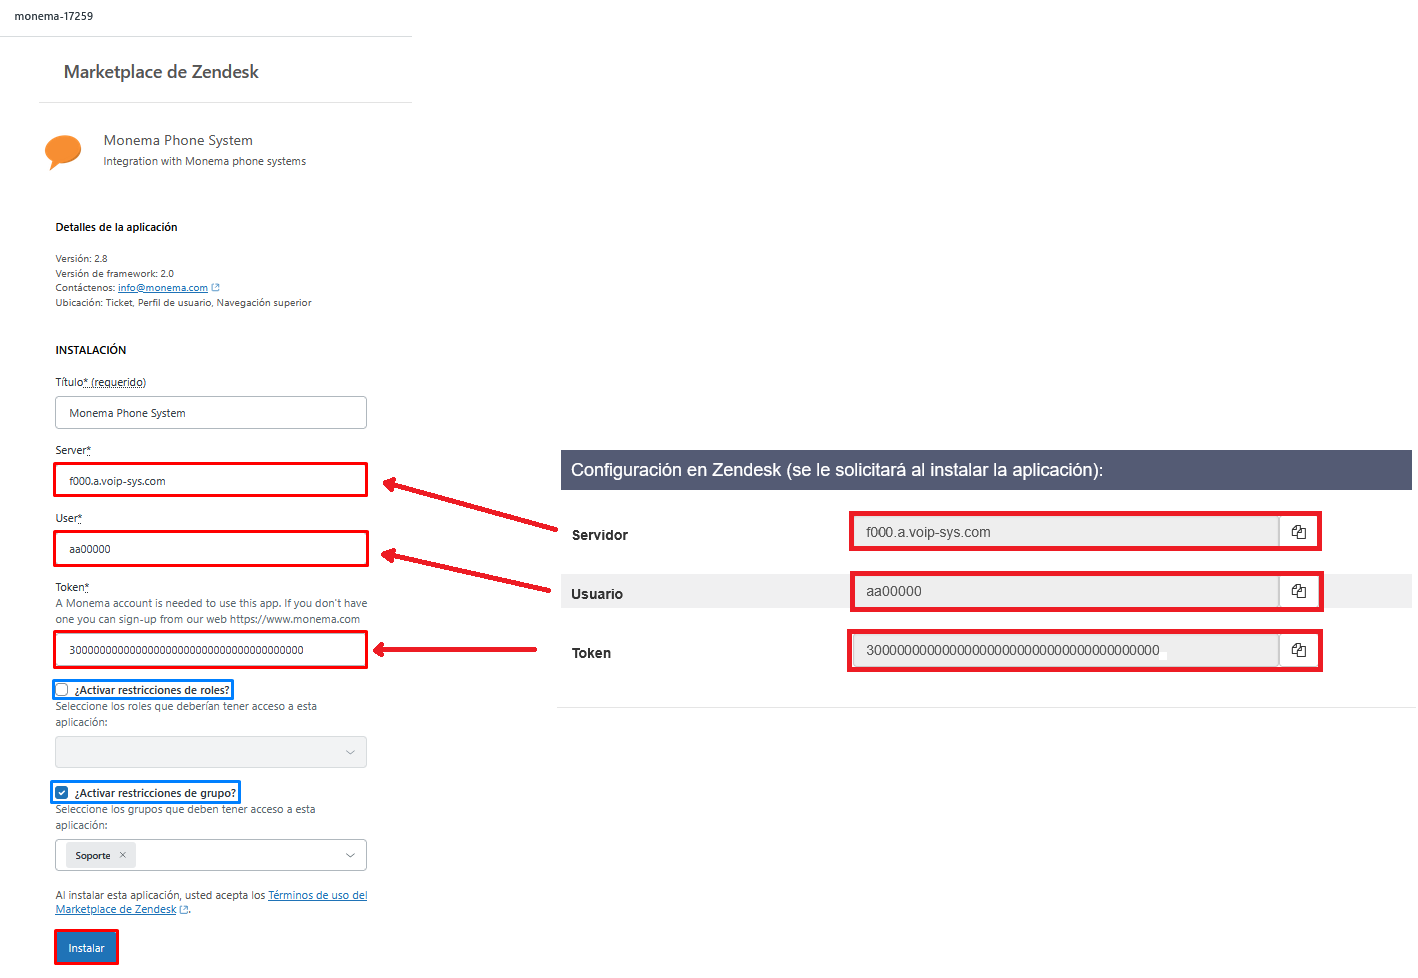
- The integration settings will now appear. You'll need to fill in the following fields based on the information in the Monema control panel > Integrations > Zendesk > Configure > “Zendesk Settings.” Finally, click “Install.”
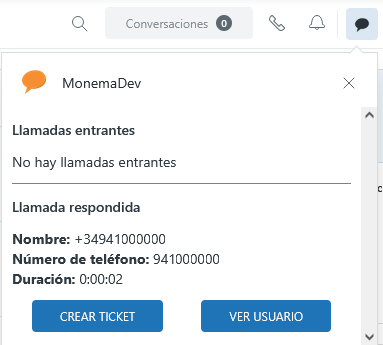
With that, the Zendesk integration should now be up and running. You can verify this by checking for an icon in the top-right menu, as shown below.

We recommend making a test call (incoming or outgoing) from one of your PBX numbers to one of the configured extensions to see if the call is received.
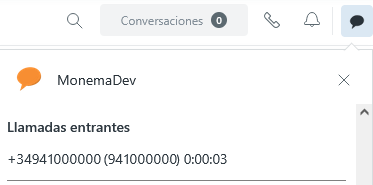
When you answer the call, something like this should appear: